In an upcoming project we will use Citrix ADC VPX (formerly known as NetScaler ADC or Citrix NetScaler or … ) appliance as Web Server load balancer. Based on that I deployed Citrix ADC VPX version NS12.1: Build 49.23.nc in my lab today to prepare the auto, via REST API, configuration needed when deploying and decommission Web Servers Virtual Machine (VM).
So the idea is to present the following blog posts:
- Deploy Citrix ADC VPX On Nutanix AHV
- Install Apache On CentOS
- Initial Citrix ADC VPX Configuration
- Citrix ADC VPX Web Server Load Balancer Configuration
Now back to the topic, Citrix ADC VPX is available as a virtual appliance for the following hypervisors:
- Citrix Xenserver
- Microsoft Hyper-V
- VMware ESXi
- KVM
The KVM qcow2 file can be uploaded to Nutanix image Server and be used for deployment on Nutanix AHV. There is also a container version available if that suits your purpose better than a VM.
Below are the steps taken make the Citrix ADC ready for use:
- Upload the qcow2 Image to Nutanix Prism Central
- Create an AHV Citrix ADC VM
- Perform initial Citrix ADC configuration
- Verify Citrix ADC Access
Upload Citrix ADC VPX qcow2
After downloading & unpacking the Citrix ADC VPX for KVM 12.1 Build 49.23 citrix.com/download file it is time to upload it to Nutanix Prism Central.
- Log in to Prism Central -> Explore -> Images -> Click Add Image
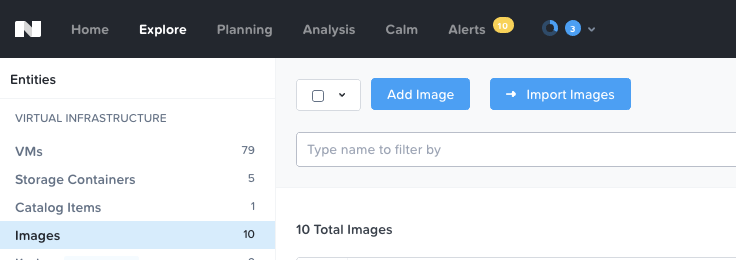
- Click Add File, select the qcow2 file and click Open

- Provide the below information and click Save
- Image Name
- Image Type (should be disk)
- Image Description

- Verify the Image is uploaded

Create an AHV VM
Create the Citrix ADC Nutanix AHV based VM according to the below steps.
- Log in to Prism Central -> Explore -> VMs -> Create VM
- Provide the following information:
- Name
- Description
- Timezone
- vCPUs = 2
- Number of Cores Per vCPU = 1
- Memory = 4GB
- Remove the CD-ROM – IMPORTANT!!
- Add the qcow2 disk image
- Type = Disk
- Operation = Clone from Image Service
- Bus Type = IDE
- Image = Citrix-ADC-12.1

- Network Adapters (NIC)
- VM configuration should look similar to the below


- When the VM is created you need to add a VM Serial Port to the VM using e.g. acli command via any Nutanix Controller Virtual Machine (CVM) in the Nutanix cluster. #Heads Up! – You can not run acli commands from Prism Central.
- Run the below command from a CVM SSH session:
- acli vm.serial_port_create citrixadc01 type=kServer index=0

- citrixadc01 is the VM name so change it to match your VM name
- acli vm.serial_port_create citrixadc01 type=kServer index=0
- Verify the VM serial port configuration by running the below command
- acli vm.get citrixadc01 |grep -A 3 serial_port
- Output should be similar to:

- Same here – citrixadc01 is the VM name so change it to match your VM name
- Run the below command from a CVM SSH session:
Perform initial Citrix ADC configuration
Now let’s get on to the last step and perform the initial Citrix ADC VM initial configuration so we can start using the features available.
- Start the VM and watch it boot via the VM console

- Login the the appliance using the following credentials:
- Login = nsroot
- Password = nsroot
Important – If the nsroot user is not working and you need to use the user nsrecover something is wrong. Start over with creating a new VM.
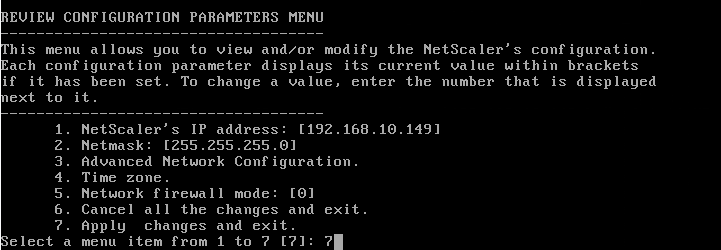
- Start the configuration by typing command “config ns” without the ” signs and the below menu will appear.

As you can see the Citrix ADC appliance comes with a pre-configured IP address of 192.168.100.1. If it says not configured something is definitely wrong. - Type 1 and press enter, provide IP address and Netmask
- Press 7 to Apply Changes and Exit
- Press enter to reply Yes to the save the configuration question

- Type Yes to the reboot question and the Citrix ADC VM will reboot.

- Once the VM is restarted login with same credentials (nsroot/nsroot) one more and add a default gateway. I have no idea why that is not included in the “config ns” menu but you need to do it manually by enter the command:
- add route 0.0.0.0 0.0.0.0 Default_Gateway

- In my case the Default_Gateway was 192.168.10.1
- add route 0.0.0.0 0.0.0.0 Default_Gateway
- Log out from the console and log back in again to verify the default route configuration. Use the below credentials:
- Login = nsrecover
- Password = nsroot
- Type “netstat -rn” and press enter to verify the default gateway configuration

Verify Citrix ADC Access
A few verification steps
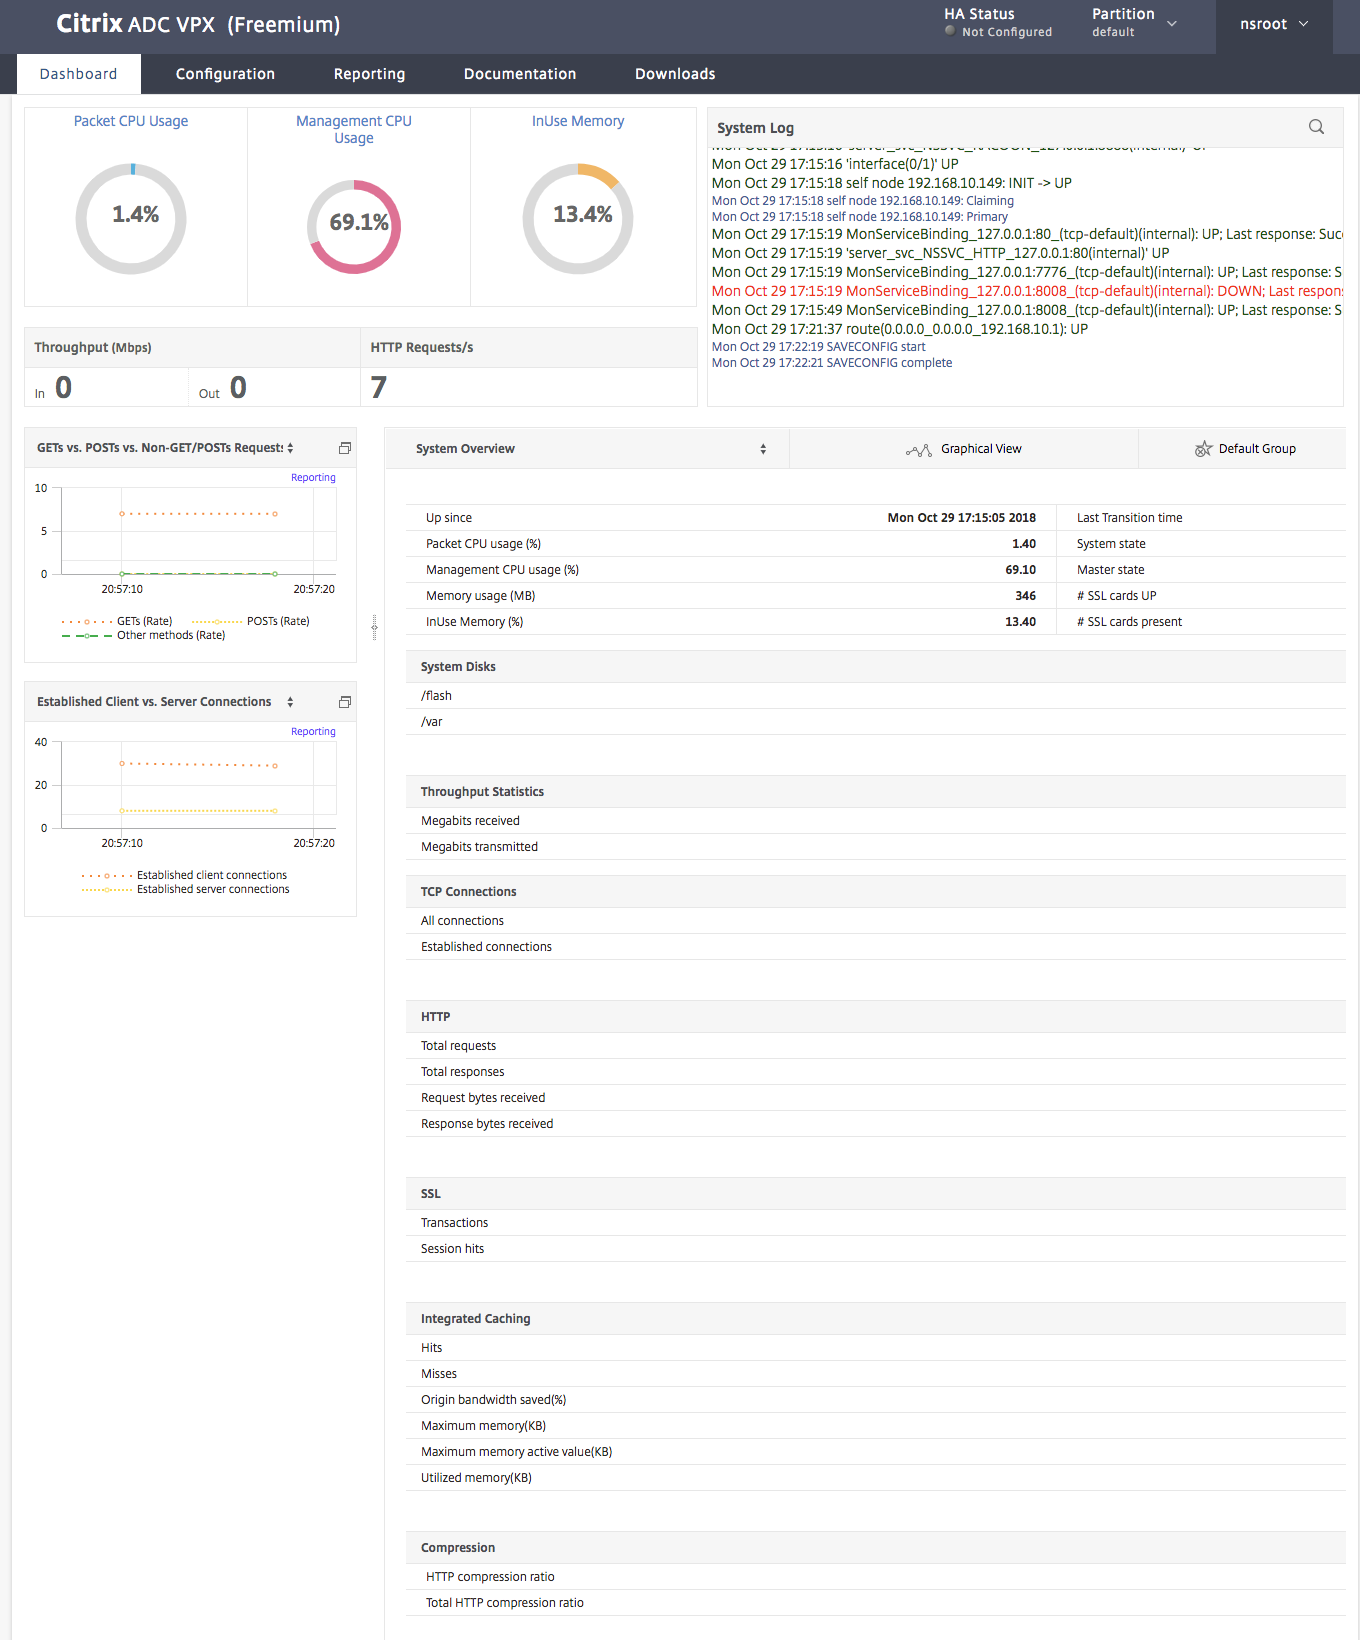
- Start a browser to the configured IP address, in my case 192.168.10.146, and login with:
- User Name = nsroot
- Password = nsroot

- Click Enable or Skip to participate in Citrix User Experience Improvement Program

And that’s it, enjoy the Citrix ADC features and capabilities
1 pings