
The process can be divided into three sections according to:
Preparation
In this step you should read, understand and perform the necessary steps included in this official VMware documentation before you move on to the next section. In addition to do some reading you should also download the VCSA 6.5 image.
Stage I
The end state in Stage I is to have a VCSA VM up and running.
Two main steps in this stage:
- Start the VCSA Migration Assistant by mounting the downloaded ISO to the vCenter Server, go to folder migration-assistant and double-click the VMware-Migration-Assistant.exe file.
- Give the adminsitrator@vsphere.local (or what ever SSO domain you are using) password:
 Wait for connection

- Give the adminsitrator@vsphere.local (or what ever SSO domain you are using) password:
- Step through Stage 1 of the migration by running the vCenter Server UI Installer
- Start the vCenter Server Installation UI and click Migrate

- Accept license agreement

- Provide FQDN, SSO user name and SSO password for existing vCenter Server

- Accept SSL certificate
- You can select an ESXi hosts or a vCenter Server as target for your VCSA VM deployment. In my case I used an ESXi host

- Click Yes to the certificate warning
- Provide VM Name and a root password for the VCSA VM

- Select target Datastore (where your VCSA will be placed/running)

- Select and provide the following:
- Network, in my case an ESXi Virtual Standard Switch (VSS) port group called mignetwork
- Temporary IP information for the VCSA VM so it can be online same time as original vcenter Server
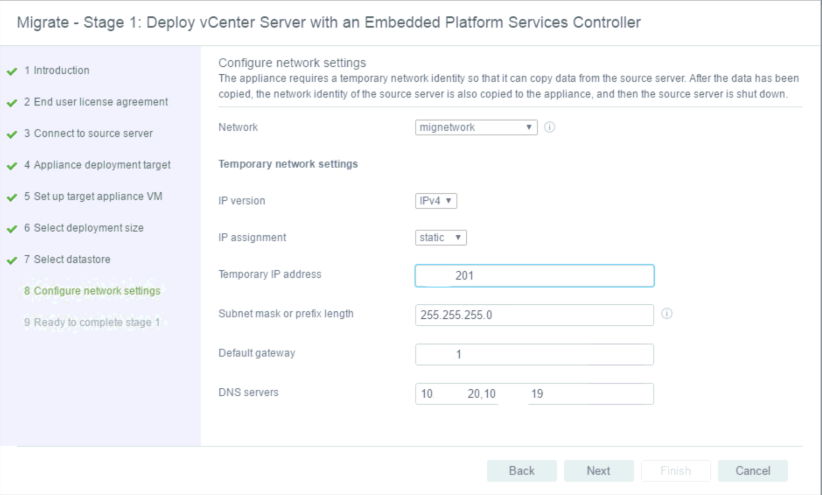
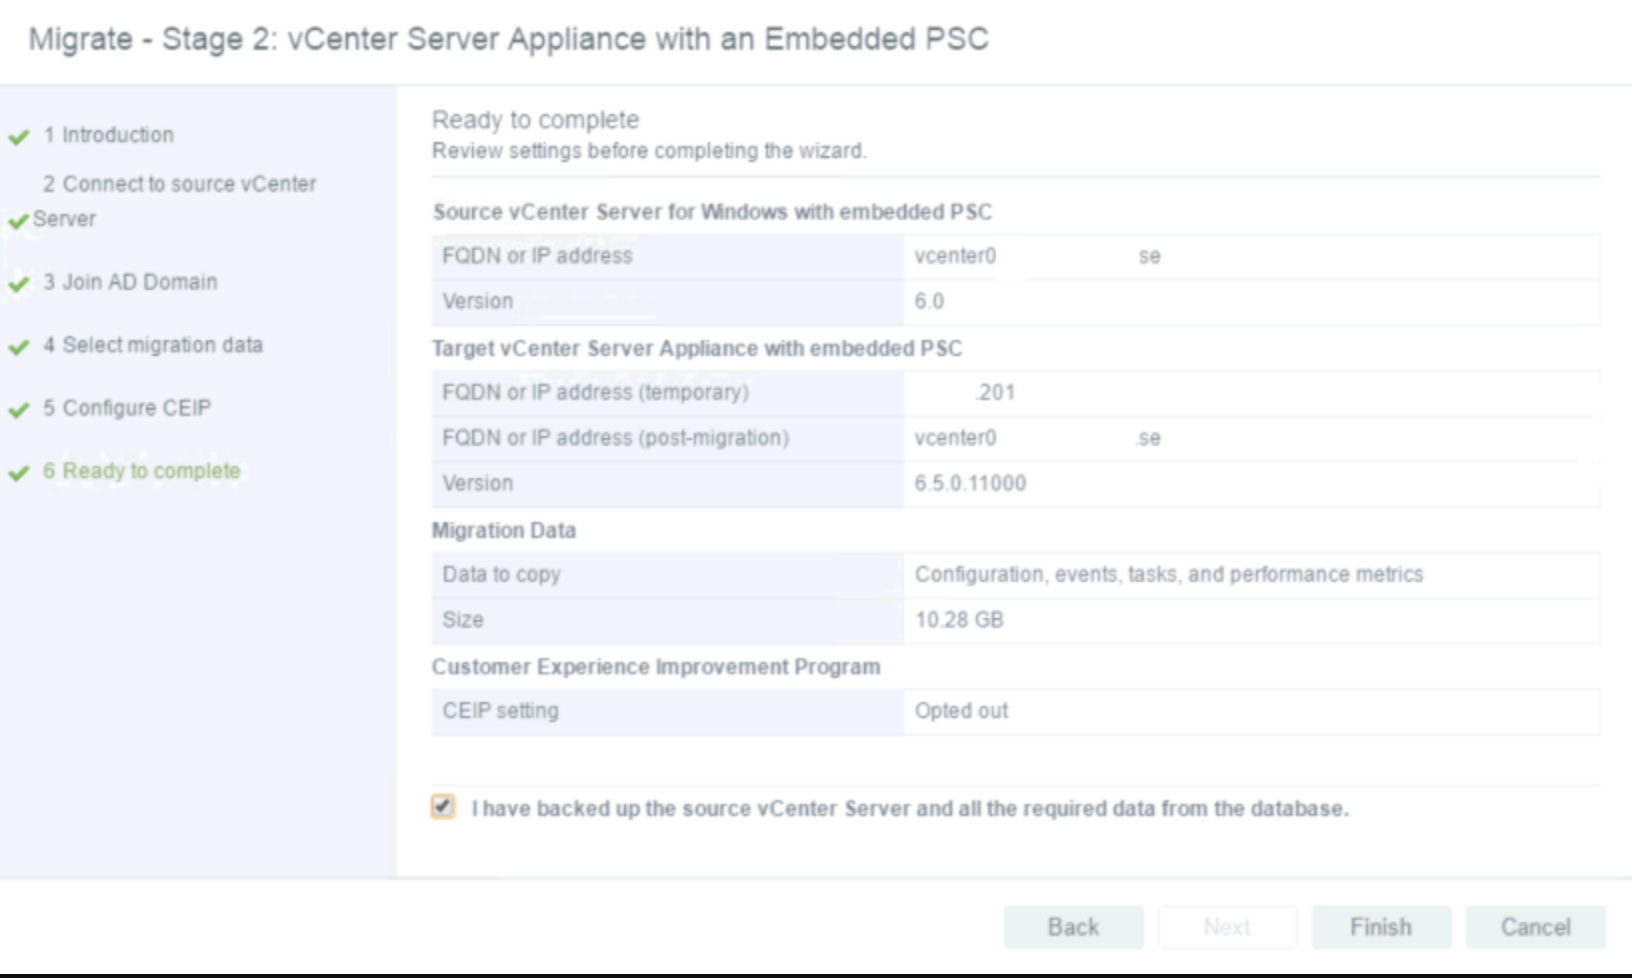
- Review the information and click Finish

- Wait until the process is finished.

- When the process is finished you can either click Close or Continue. If you select Continue you will automatically be taken to Stage 2

- Start the vCenter Server Installation UI and click Migrate
Stage II
In Stage II we will actually migrate the vCenter Server component including all its data to the VCSA and the end state will be VCSA up and running and old Windows based vCenter Server turned off.
If you selected Close at the last step in Stage I you can start Stage II by loggin in to the VCSA VM admin interface which can be accessed via https//fqdn:5480
In my case I selected Continue and the below interface was started automatically. Follow the below steps to complete the migration.
- Click Next

- The Pre-migration check results includes any potential issues you might run in to. In my case, just an outdated plugin.

- Since the Windows based vCenter Server VM was a member of the domain we need domain credentials

- Select what type of information you want to migrate. In my case I selected everything mening:
- Configuration
- Tasks & Events
- Performance Metrics

- I did not Join VMware Customer Experience Program (CEP)
- Watch the migration happen via the Migration wizard or Migration Assistant cmd window which will be unavailable when the Windows based vCenter Server shut down as a step in the migration process.


When completed you are all good to go. Remember to login to the admin interface via https//fqdn:5480 to perform any additional configuration, take a manual backup or check out the blog post about how to Schedule vCenter Server Appliance backups via PowerCLI.
5 pings