
The other blog posts in the series are:
- Nutanix Self Service Portal Part I – Preparation & Initial Configuration
- Nutanix Self Service Portal Part II – Projects
- Nutanix Self Service Portal Part III – Roles
- Nutanix Self Service Portal Part IV – Images
- Nutanix Self Service Portal Part VI – Catalog Items
This blog post will focus on VM Management and include
- Create VM
- Interact with the VM and make changes
- Add VM To Catalog
- Manage VM Ownership
- Manage VMs not created via SSP
Create VM
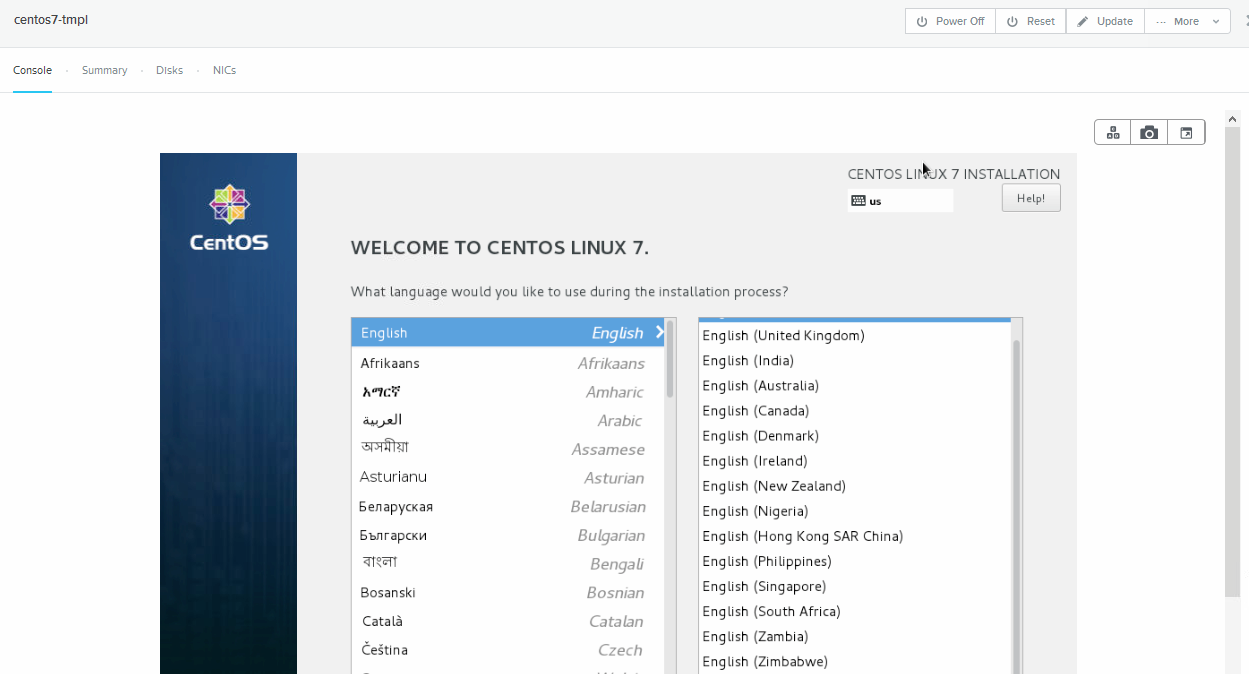
There are two options to create a new VM, from the the end user interface or the Admin interface.
End User Interface
Follow the below procedure to create a VM from the End User section.
- Click Create VM

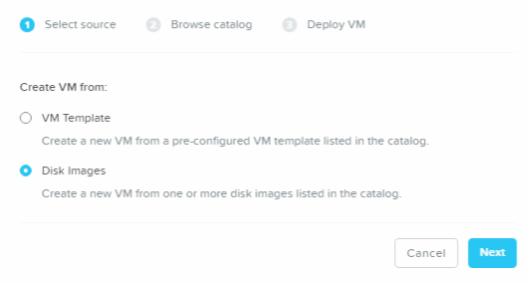
- Select source – which got two options
- VM Template which require a preinstalled VM added the Catalog
- Disk Image which is either an ISO or VM disk added to the Catalog – This is the option i’ll use since we don’t have any VMs in the Catalog at this point.
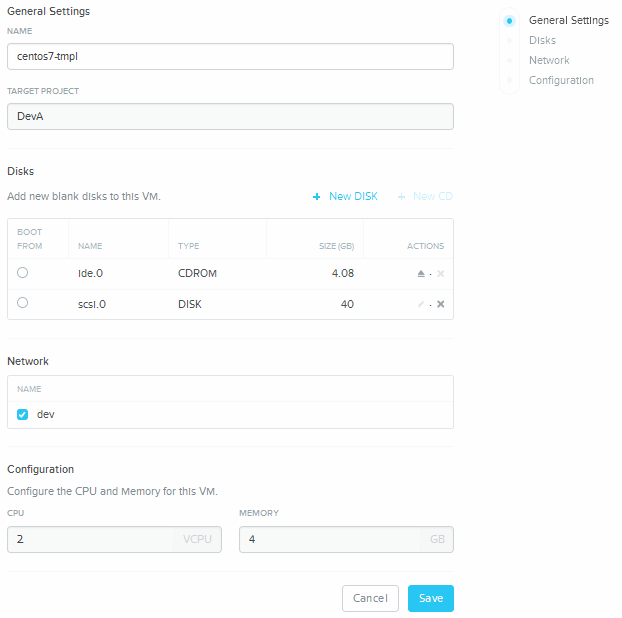
- Select the Disk Image – I will be using the CentOS7 image

- Fill out the VM Deployment information including:
- Name
- Target Project – Only Project DevA available at this point in time but if the user belongs to multiple Projects they will all be available in the drop down list.
- Disks – In my case the CDROM was automatically created and then i added one additional hard disk with the size of 40 GB.
- Click New Disk
- Fill in the size
- Click save
- Select Network – Only dev network available in my case but if you got more available networks which is controlled by the admin they will be in included here.
- Advanced Settings let’s you configure:
- CPU – This is the actual VCPU(s) and not Number of Cores Per vCPU
- Memory
- Review your settings and click Save
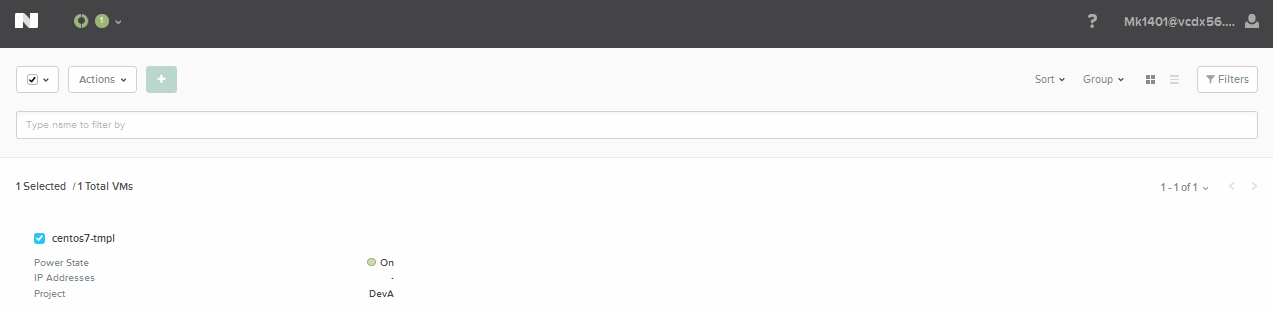
After the VM is created it will automatically be powered on.
Admin interface
Actually not much to mention about creating a VM from the Admin interface since it is the same workflow. The only difference is that the Create VM button is located in the VM section which you enter by selecting VMs on the left hand side of the Admin portal.

Note: Just because you are a Admin user it does not mean you are able to create VMs. You need to be assigned to a project before the Create VM button will be available in the Admin portal.
Interact with the VM
You can manage your VMs from End User Interface and Admin Interface.
End User Interface
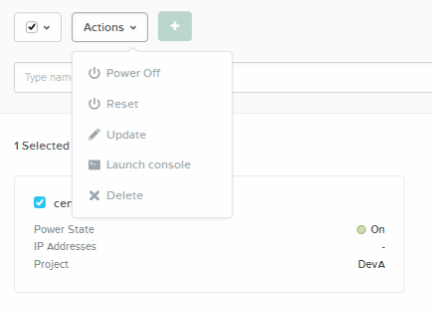
The available VM Actions from the End User Interface includes:
- Power Operations
- Update
- Launch Console
- Delete
Via the End User interface you got two options where the first one is the default view, where you end up when logging into as an end user, or by accessing a specific VM via the default view.
- Default View – This is where you can perform Power operations, Access the VM Update View, Launch the VM Console and also Delete the VM,
- Highlight the VM you want to interact with.
- Select the appropriate action from the Actions drop down menu
- The Update section brings you to the same view presented during the VM Create workflow
- Highlight the VM you want to interact with.
- Via the specific VM view, which you reach by just clicking the VM name, you’ll reach section including the same options as in the default view but also additional information and capabilities:
- Console – This is available from the drop down as well so no additional functionality here
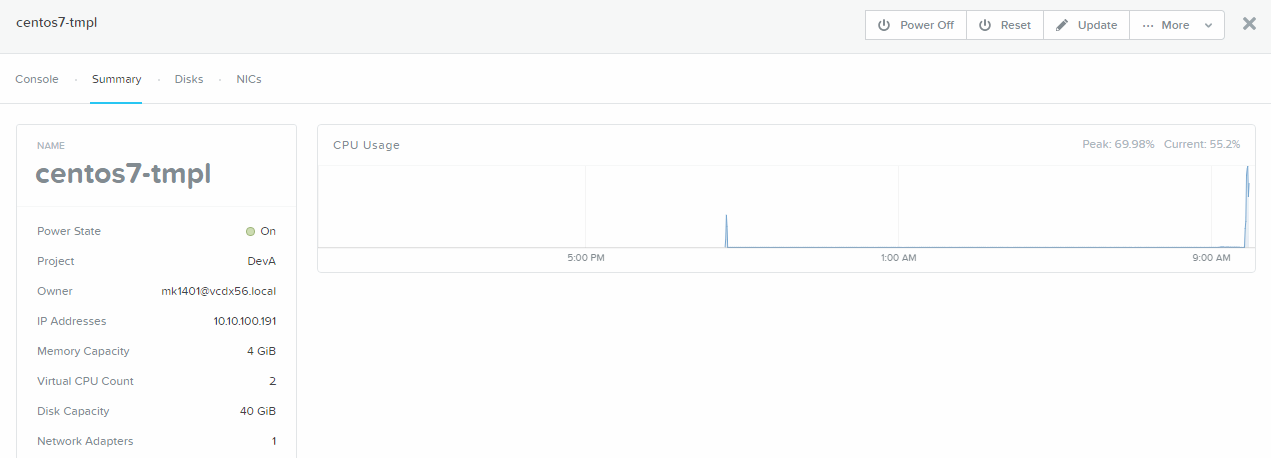
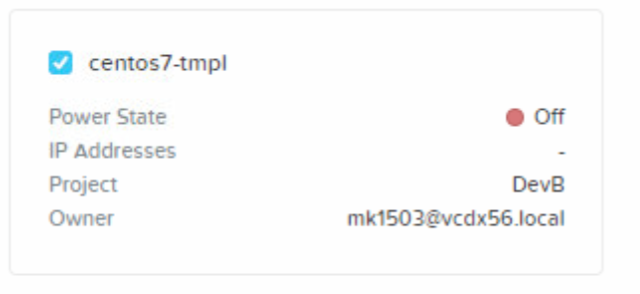
- Summary – This view gives you information about:
- Power State
- Project belonging
- Owner – Specific user
- IP Address
- Memory Capacity
- Virtual CPU Count
- Disk Capacity
- Network Adapters
- Disks – Gives you a summary of the VM disks including:
- Disk Adress
- Disk Capacity

- NICs – Gives you information about:
- IPV4 Address
- Network – AOS network belonging
- Port Name
- MAC Address
- MTU Bytes

- Console – This is available from the drop down as well so no additional functionality here
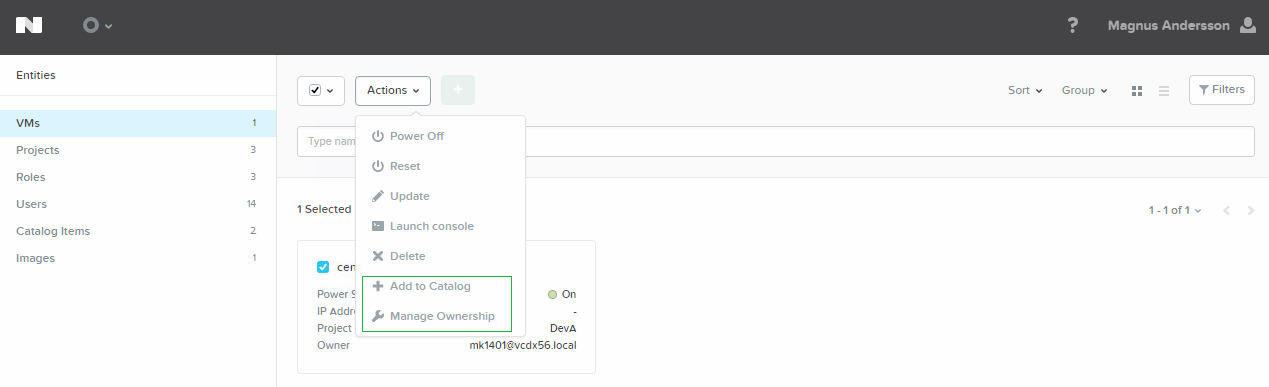
Admin Interface
The main difference from an Admin perspective from the Create VM action and manage existing VMs is that the Admin does not need to be assigned to a project to be able to perform actions/manage on existing VMs.
The difference between the Admin and the End User available actions are:
- Add To Catalog
- Manage OwnerShip
Add VM To Catalog
By adding the VM to the catalog it will be available for End User during the VM Create process. It is as simple to add a VM to the catalog as it is to add an Image to the catalog which i covered in Nutanix Self Service Portal Part IV – Images blog post.
- Highlight the VM you want to add to the catalog
- Select “Add to Catalog” form the Actions menu.
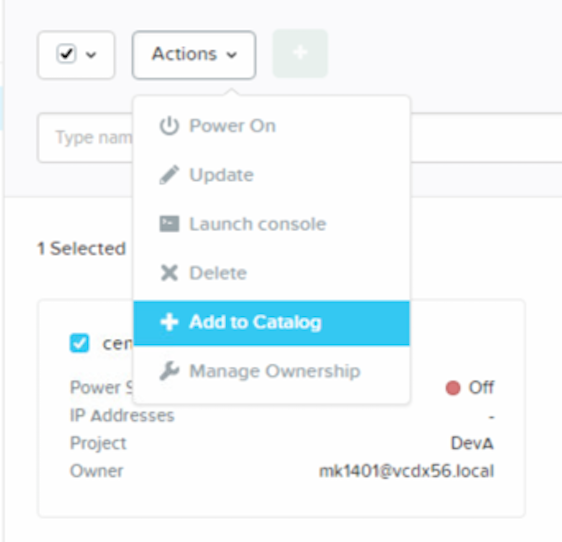
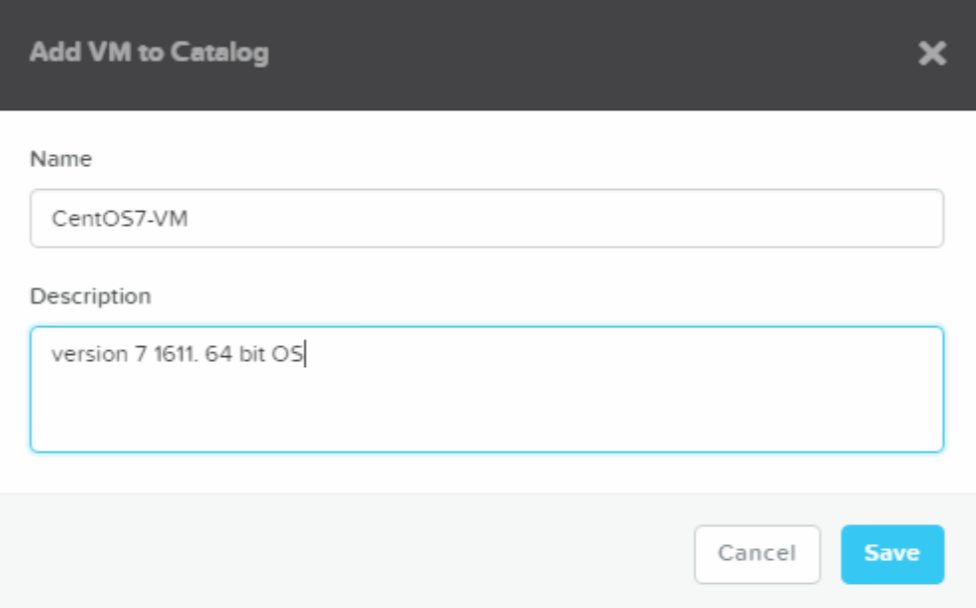
- Give the Catalog object a Name and Description -> press Save
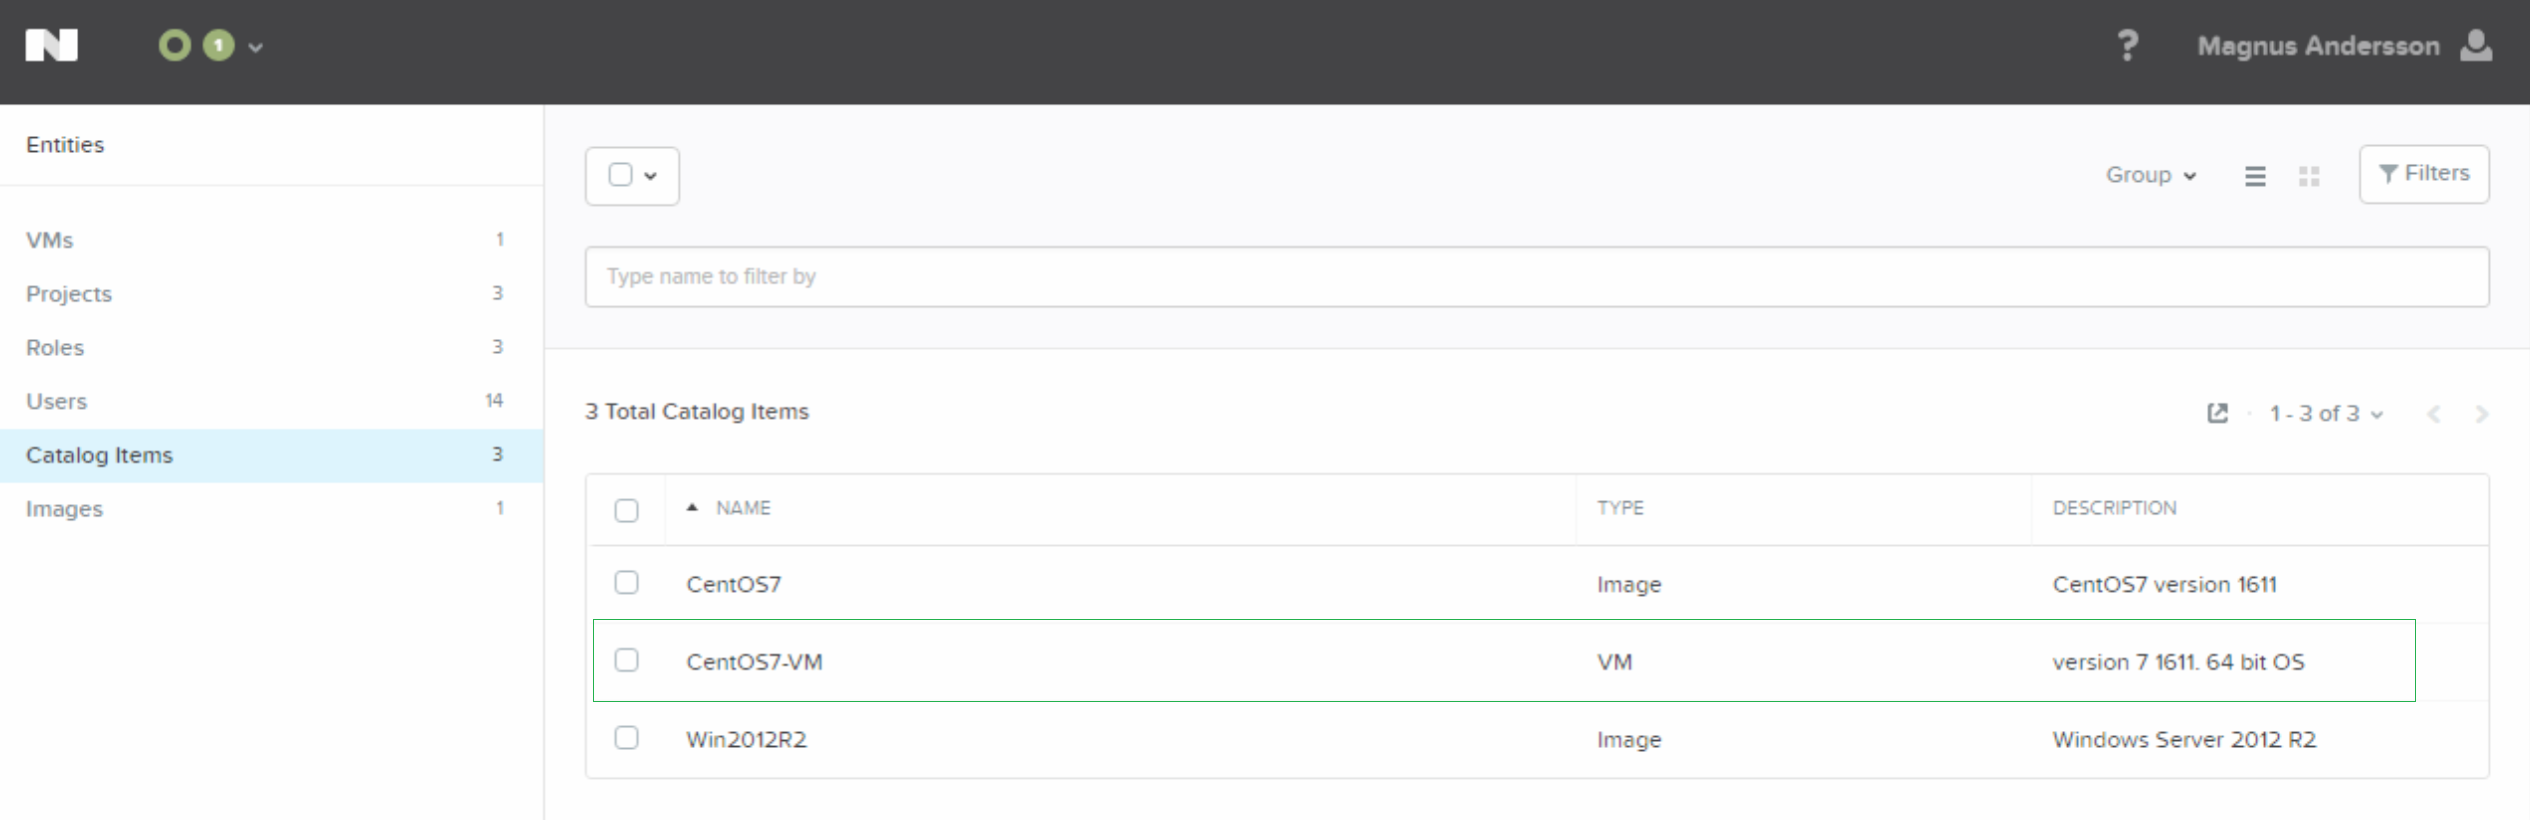
- Verify the VM was added to the Catalog
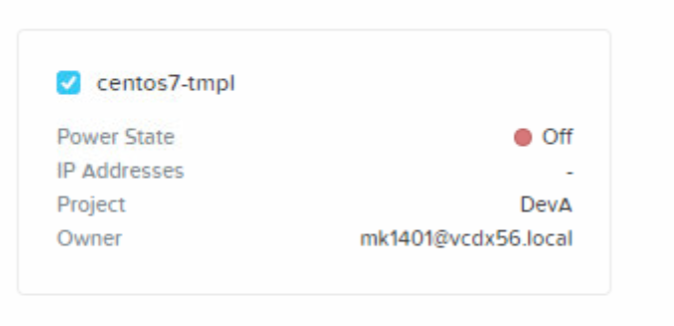
Manage VM Ownership
As an Admin you can change owner of VMs by using the following procedure.
- Highlight the VM
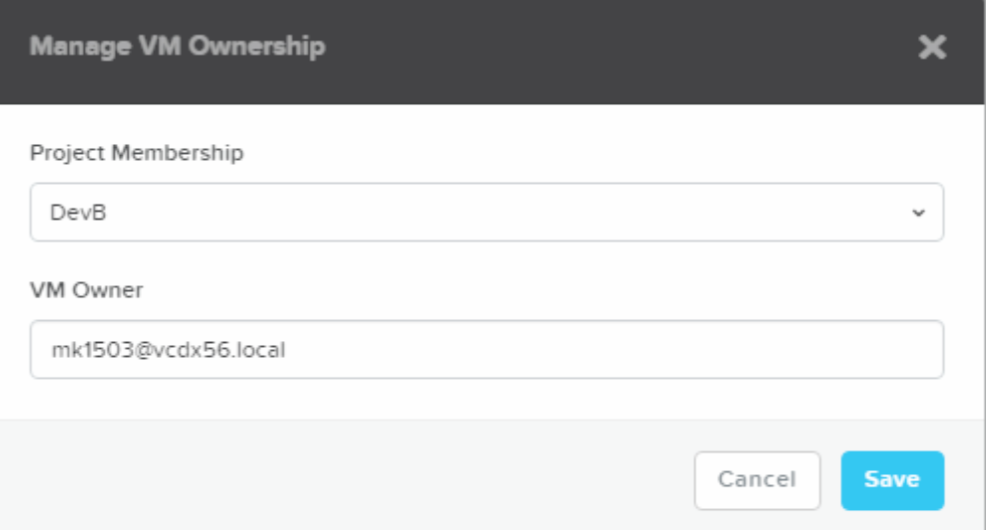
- Select Manage Ownership from the Actions drop down menu
- Select
- Projects – All projects will be available in the drop down box
- VM Owner – All users added to the project will be available. Just highlight the VM Owner text box and the available users will be listed in a drop down style. Even better, type first or a few letters included in the user name to limit the drop down result.
Verify the Project Membership and VM Owner sections have changed compared to the before the change.
Manage VMs Not Created Via SSP
There are a few situations where you can have VMs in your Nutanix cluster which does not belong to a project e.g.:
- Nutanix cluster was upgraded to 5.0 with existing VMs.
- Nutanix cluster was used and included VMs before was enabled.
- VMs created via PRISM
In any of the above situations the VMs will be available/included in the SSP VMs section as available VMs. You don’t need to assign the VMs to a project if you don’t want to but the opportunity is there and i think it’s great that we can easily assign the VMs to a project if we want.
Let’s say you have a prod VM (not assigned to a project) and you want to make a clone of it and make it available for a project for testing purposes (development, functionality, performance, upgrade and so on). Another situation is that you can have existing environment with a bunch of VMs that you want to hand over to different teams.
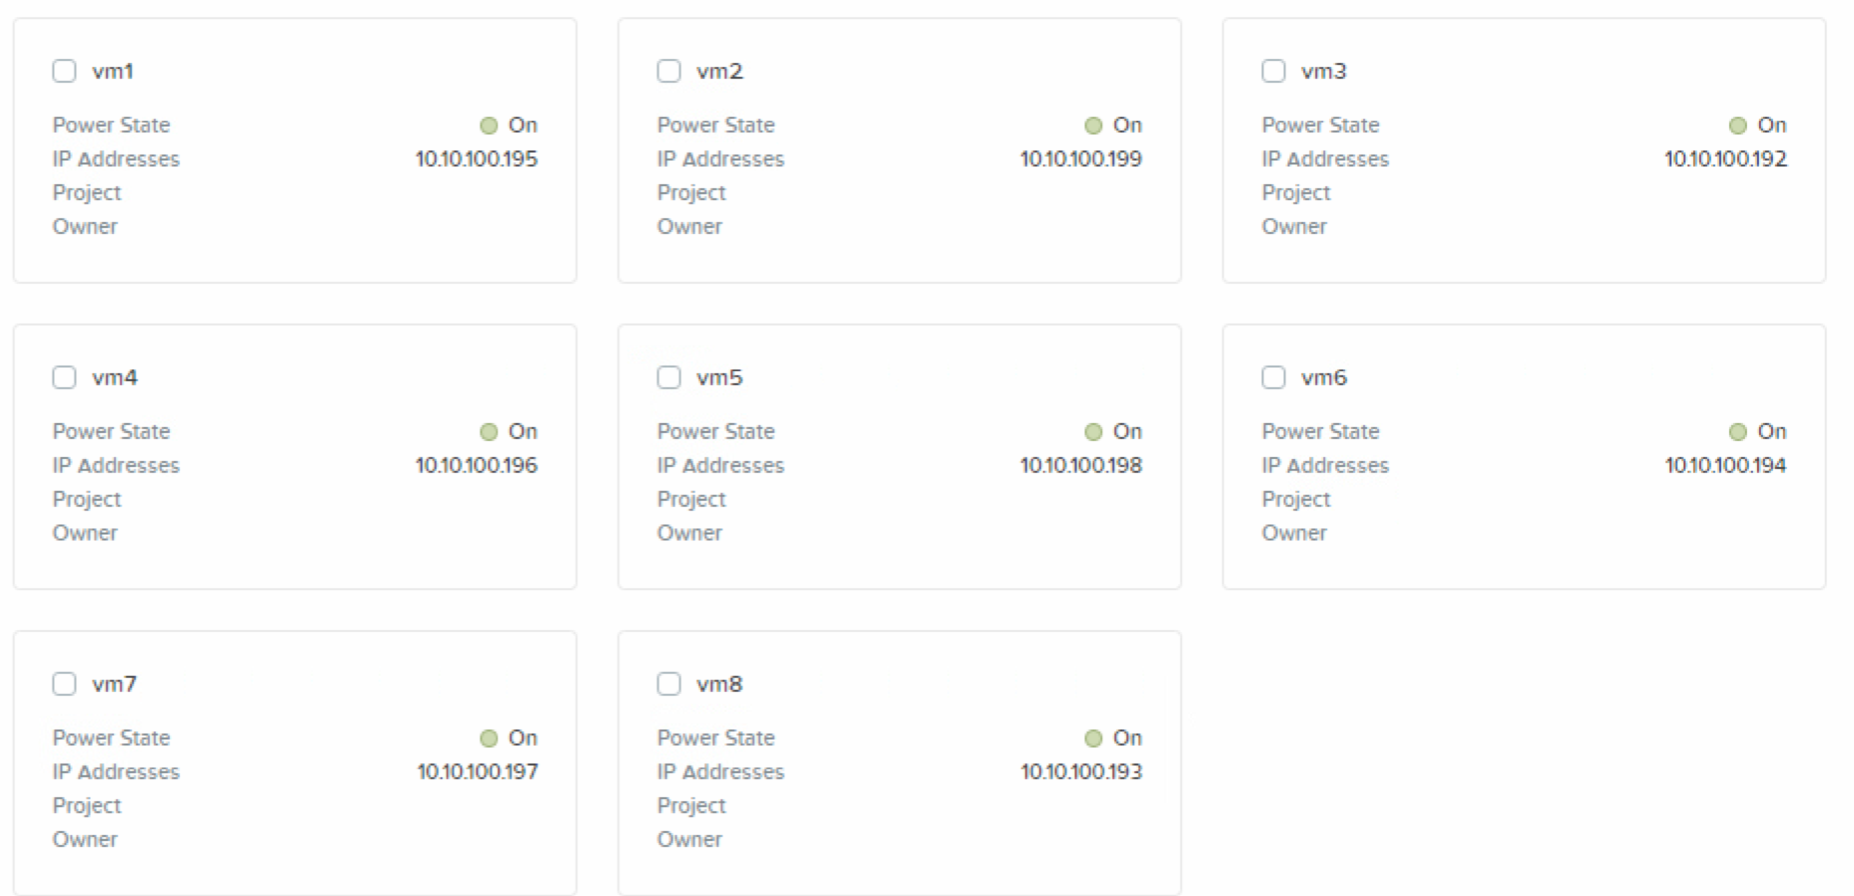
Follow the below procedure to assign a PRISM available VM to a project. In my case i have 8 VMs (VM1-VM8) that will be assign to 3 different Projects.
- Log in to SSP as an Admin and click the VMs link and filer out your VMs. Note that no VM belongs to a Project or got an Owner.
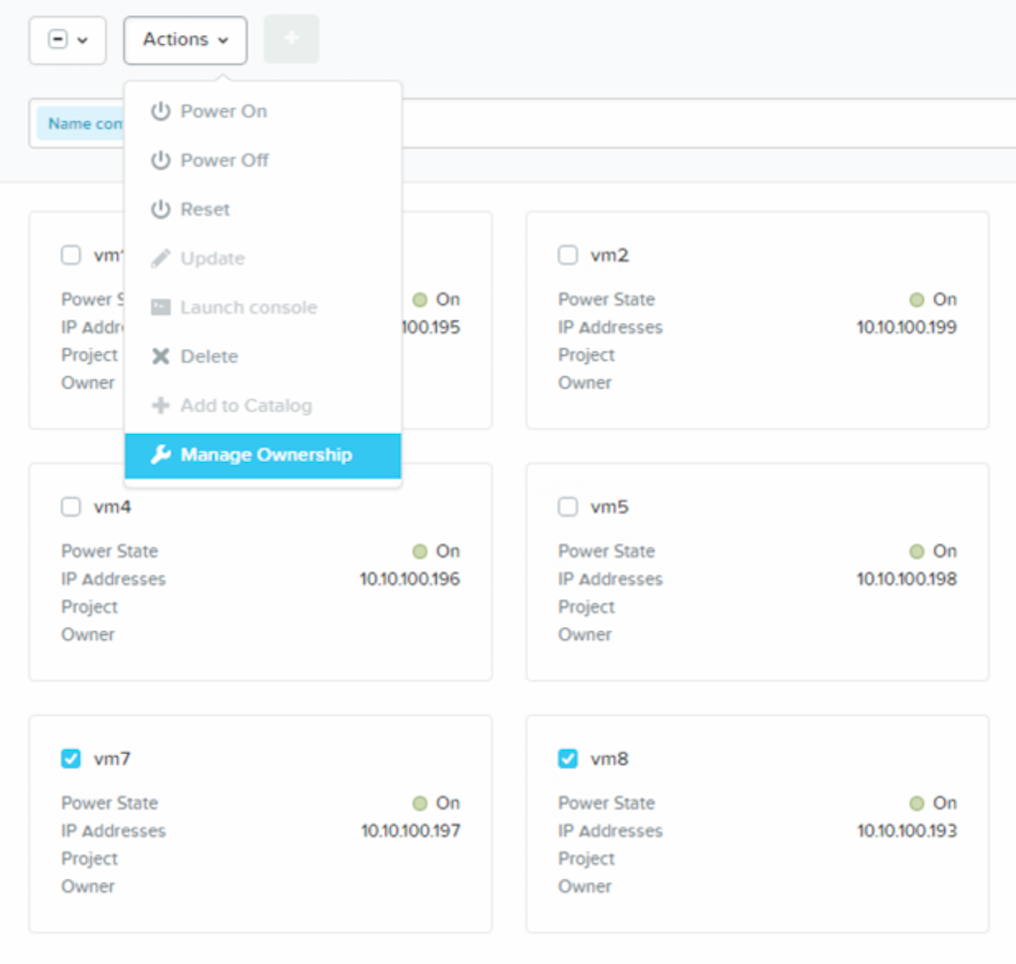
- Highlight the VMs you want to assign to a project and select Manage Ownership from the Actions drop down menu
- Select Project Membership and VM Owner

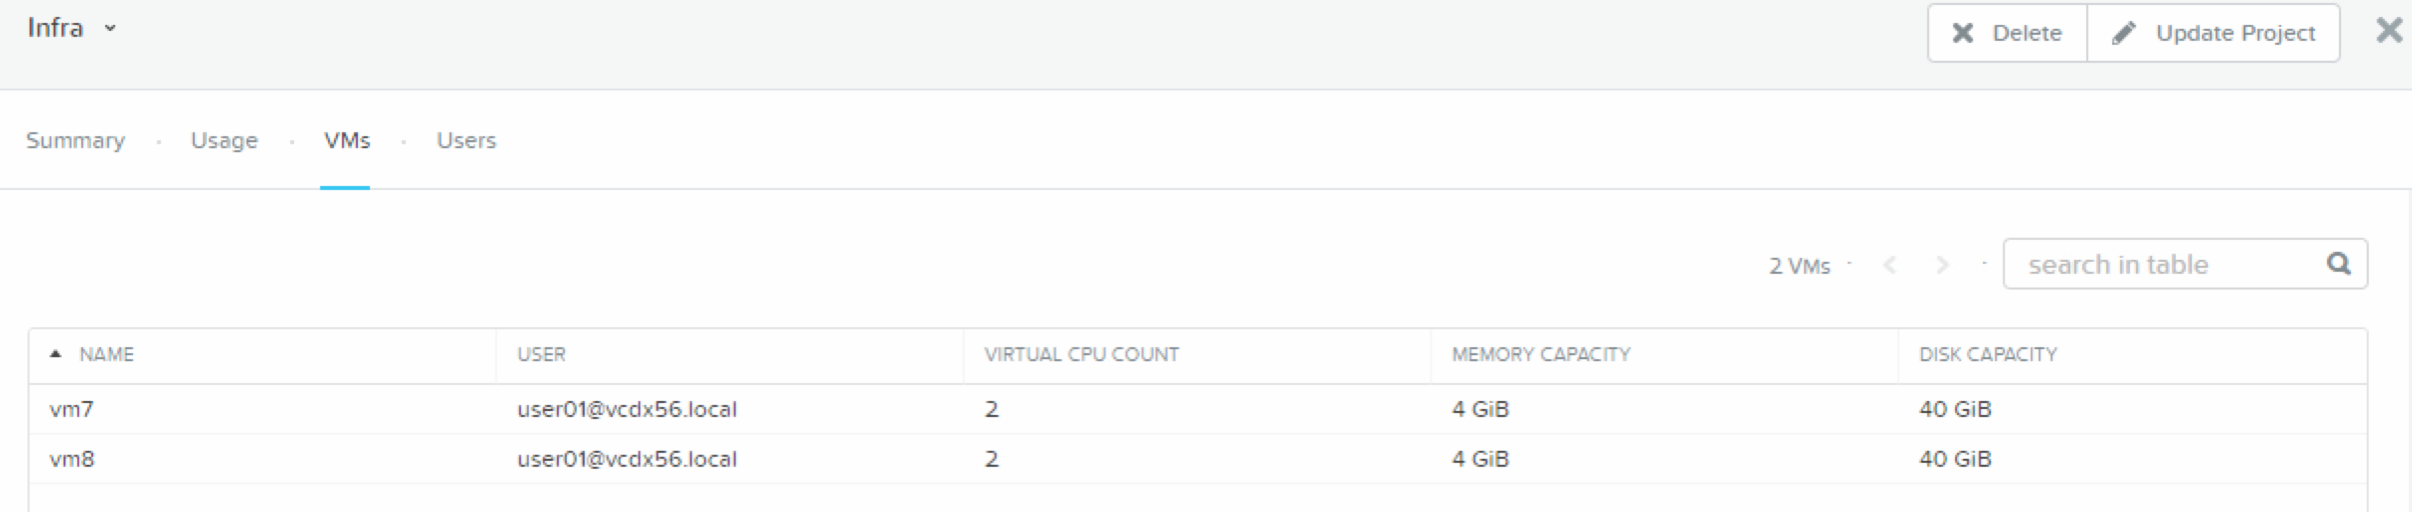
- Verify that the VMs are added to the project with correct VM owner
- Via the VMs view

- Via the Project view
- Via the VMs view
- Then just continue with the rest of the VMs
Note: Make sure the network where the VM is located is available in the project. If it is not the VMs can’t be assigned to the Project. If you can’t make the network available for the project you can always change VM network belonging via PRISM, ACLI or REST API before you assign it to a project.
3 pings