
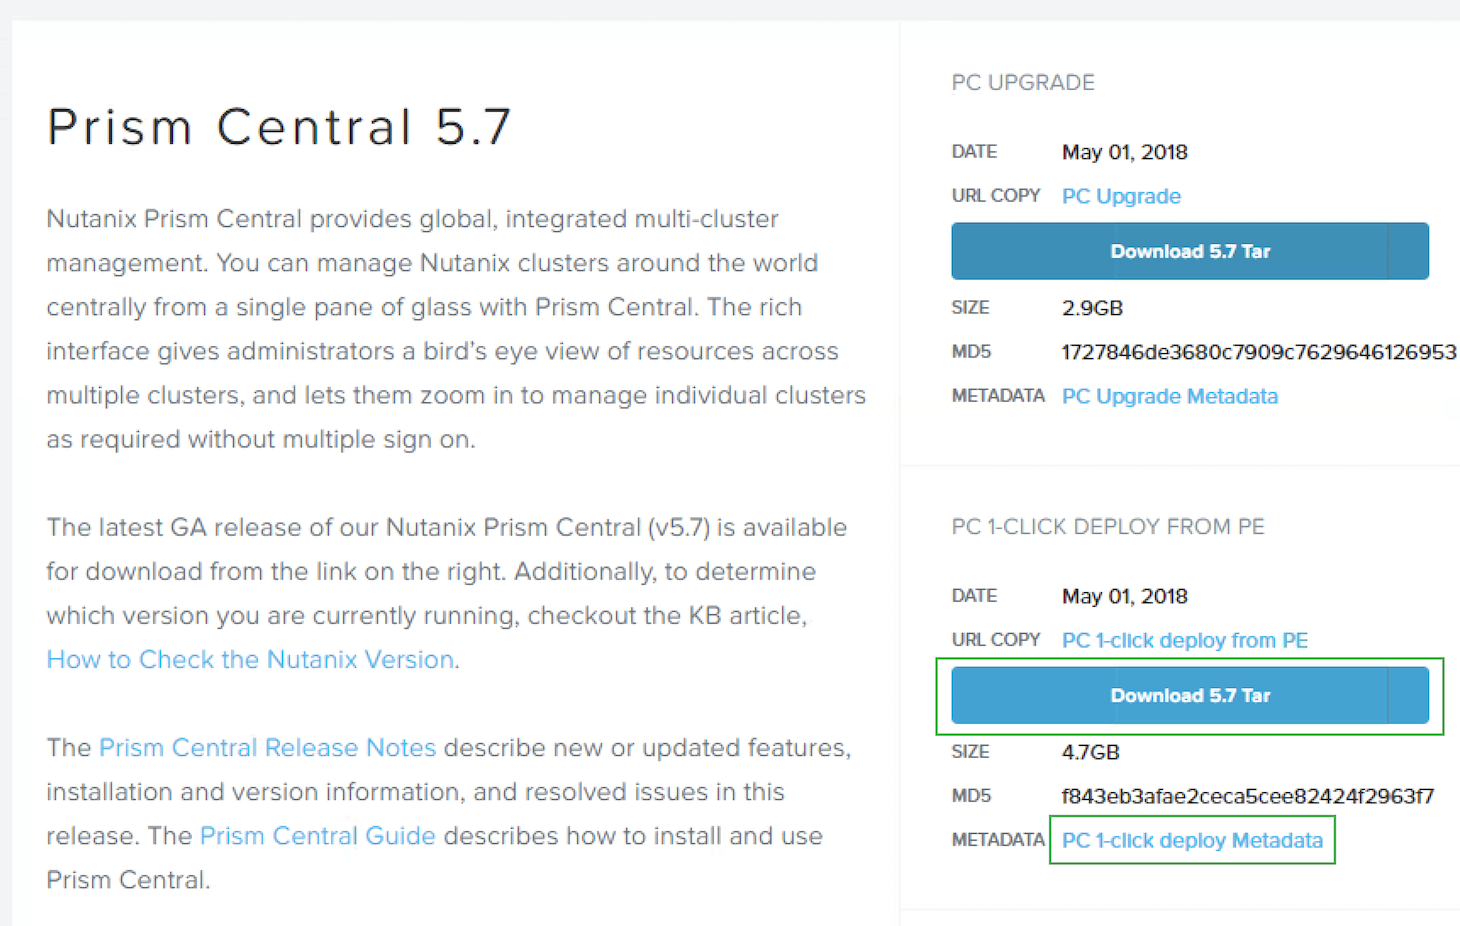
- Log in to Nutanix Portal, select Downloads -> Prism Central on the left hand side. Scroll down a bit unless you want to download the default version. In my case i selected the latest version 5.7

- In the “PC 1-CLICK DEPLOY FROM PE” section to the right click both “Download 5.7 Tar” and “PC 1-click deploy Metadata” so you get bot files you need to deploy PC from PE.
- Log in to PE and select “Register or create new” in the Prism Central section.

- Click “I want to deploy a new Prism Central instance”

- If auto download is not enabled or if the version you are looking for is not present scroll down to the section “Upload installation binary” and select the files you downloaded in step 1. Then select both files and click upload.
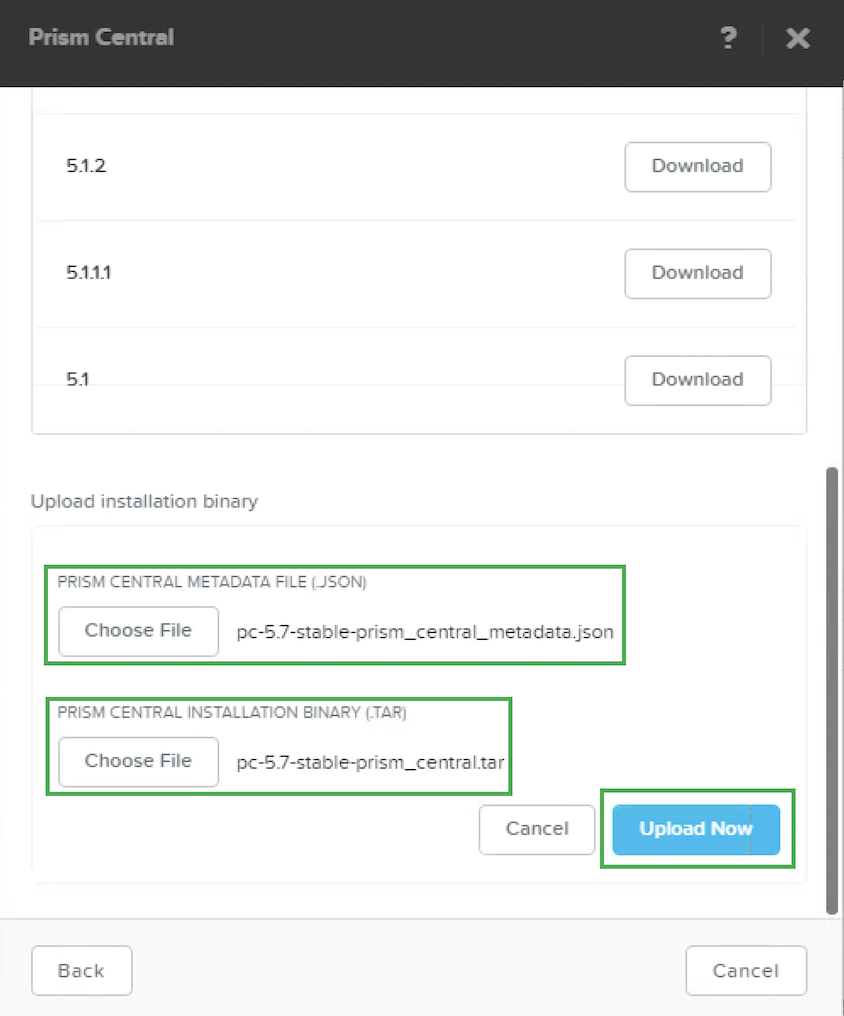
- where you can Wait for the upload to be completed

- When upload is finished, Click Install

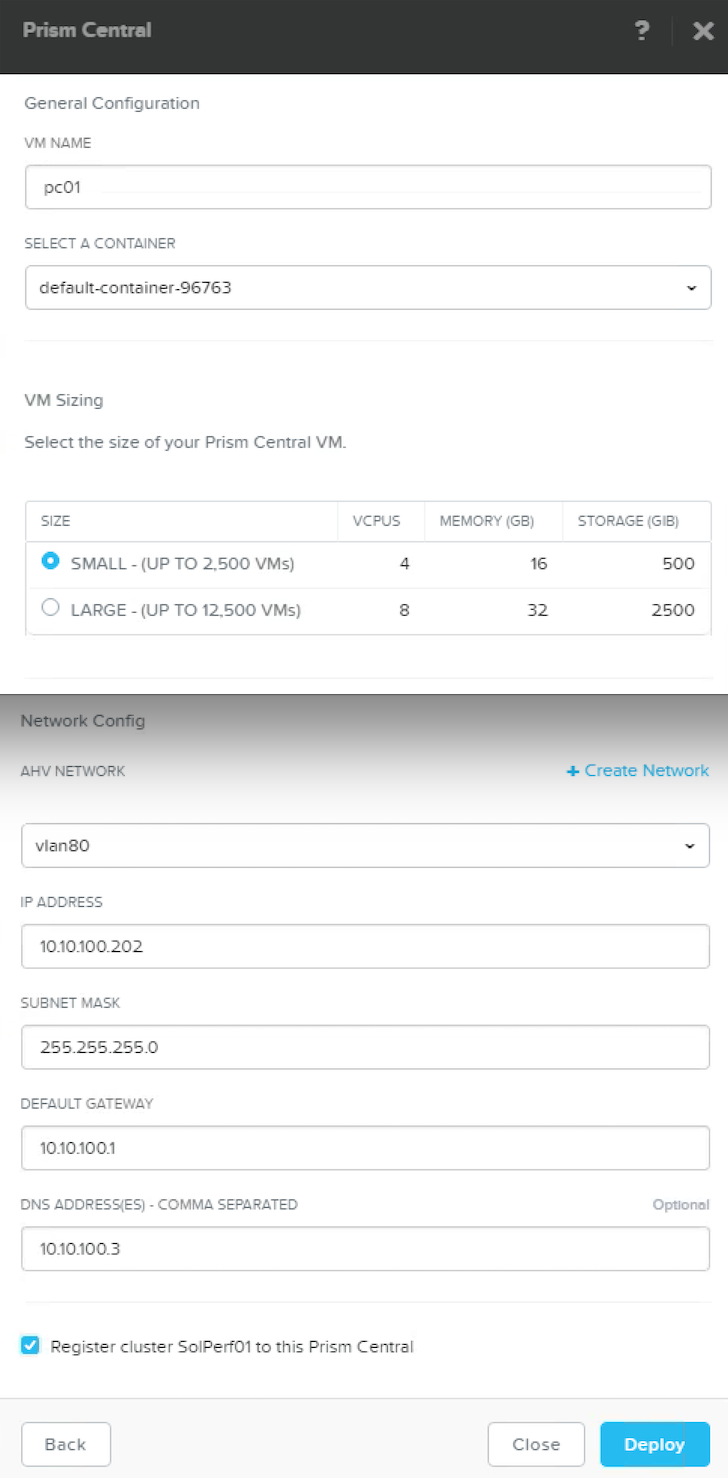
- Provide the necessary information and click deploy. Information required is:
- You can follow the deployment via Prism Task section

- Takes a few min and then it is completed

- Prism Central says ok in PE Home page

- Now just click Launch from the PC PC section or open a browser and push in the IP or FQDN if you registered the PC IP in DNS and you can do initial configuration and start having fun.

Enjoy your new PC.