
Projects
Let’s start with creating two Projects by following the below process:
- Expand Identity in the left sidebar and click Projects

- Click Create Project

- Fill in Name and Description and leave the Enabled check box checked.
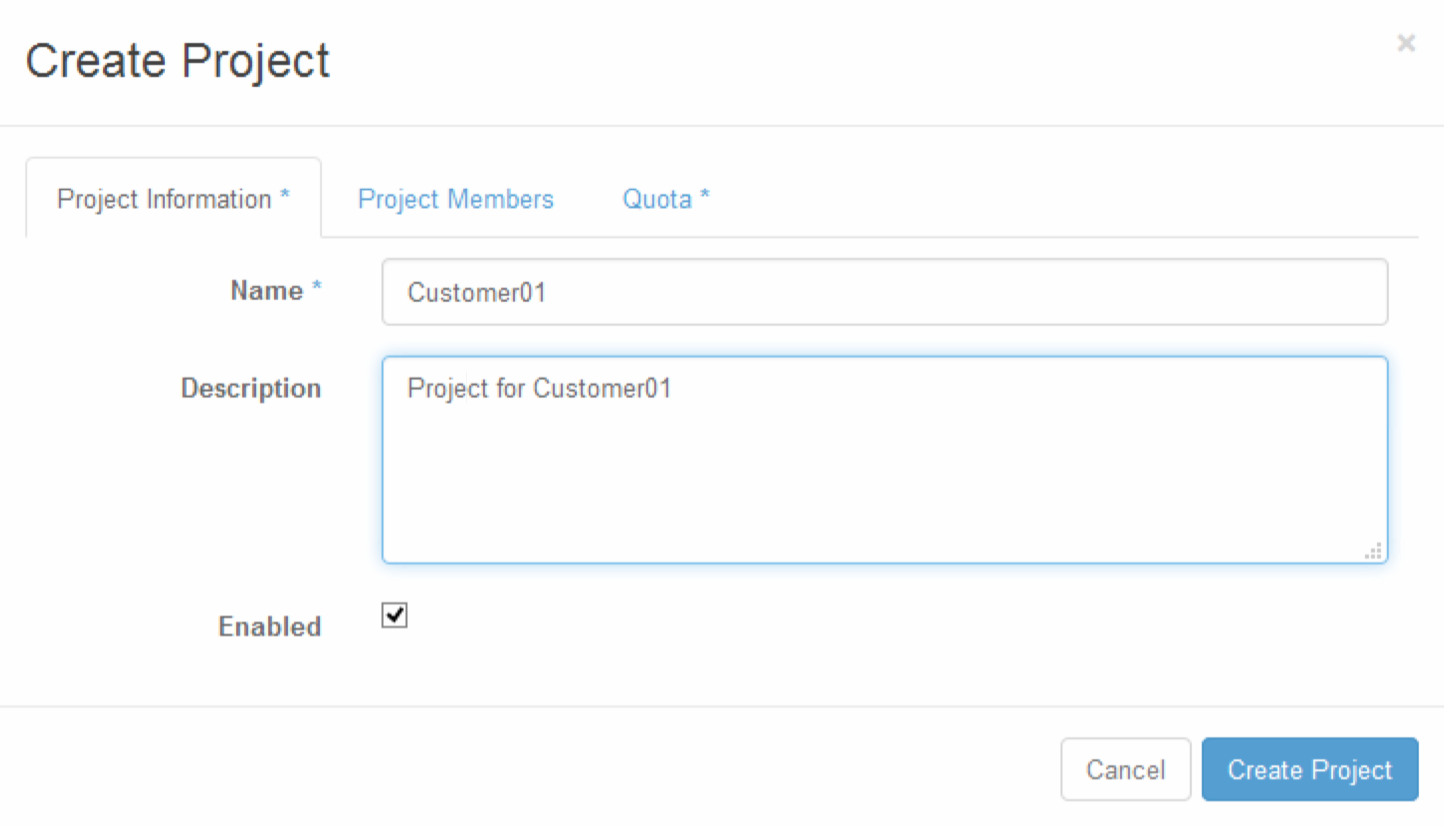
- Add Project Members as needed, In this case i’ll just add the admin user by clicking the plus (+) sign next to the user while it’s in the left pane.

- I’ll keep the Quota to the default value so when done, click Create Project
- The available Quotas you can configure are presented below using the following format, Item – Default value:
- Metadata Items – 128
- vCPUS – 20
- Instances – 10
- Injected Files – 5
- Injected File Content (Bytes) – 10240
- Volumes – 10
- Volume Snapshots – 10
- Total Size Of Volumes and Snapshots (GB) – 1000
- RAM (MB) – 51200
- Security Groups – 10
- Security Group Rules – 100
- Floating IPs – 50
- Networks – 10
- Ports – 50
- Routers – 10
- Subnets – 10
- The available Quotas you can configure are presented below using the following format, Item – Default value:
I repeated the process for the next Project called Customer02 and when clicking the admin Project link in the top bar to the left you’ll see that the user belongs to the newly created Projects:
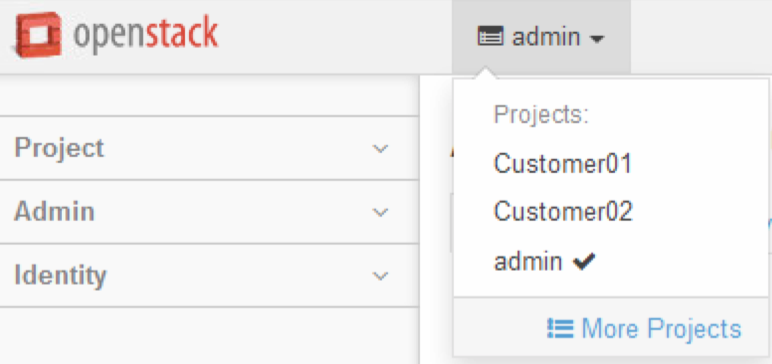
From the drop down list you can easily navigate between the different Projects.
Users
Next up is to create users for our projects. Follow the below procedure to create them:
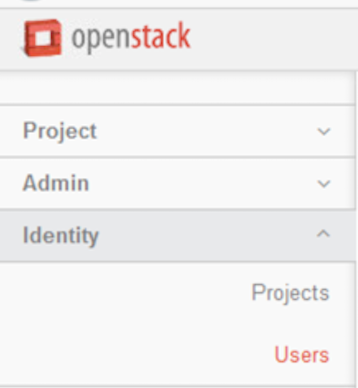
- Expand Identity in the left sidebar and click Users
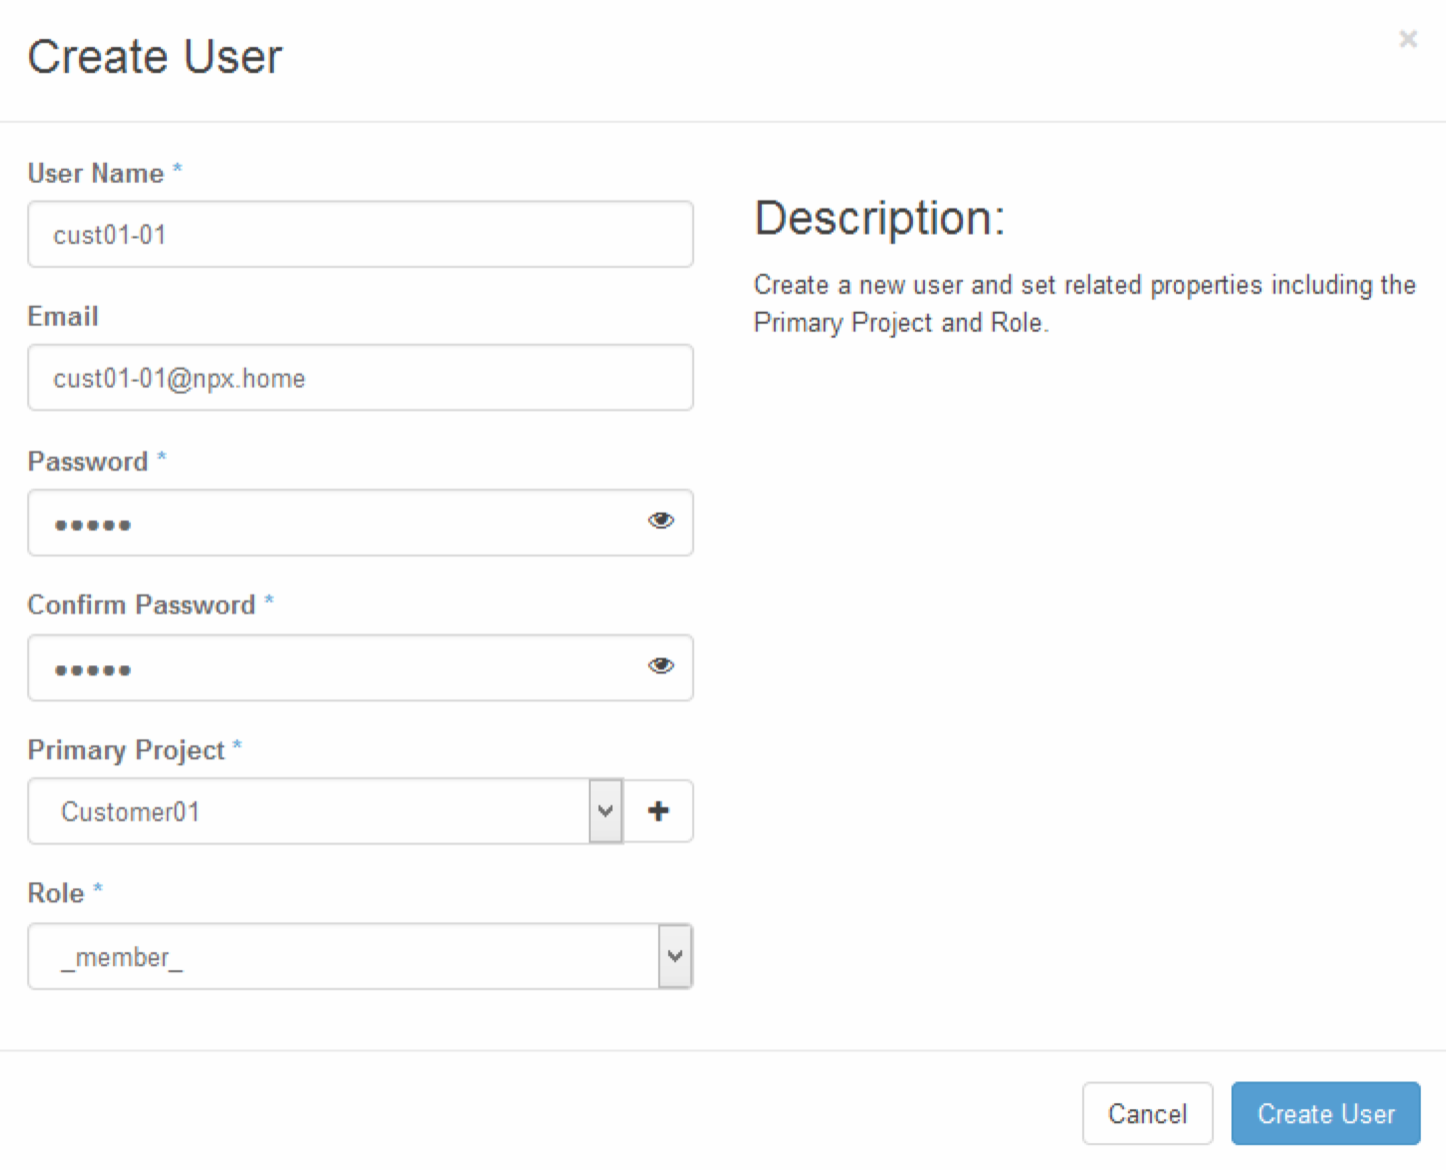
- Click Create Users

- Fill out the required fields and as many of the non required you want and click Create User:
- User name
- Password
- Confirm Password
- Primary Project
- Role
When done, log out from the portal and log in with one of the newly created users, in my case cust01-01.
- Since user cust01-01 only belong to one Project there are no other Projects available under Customer01 link in the top bar.

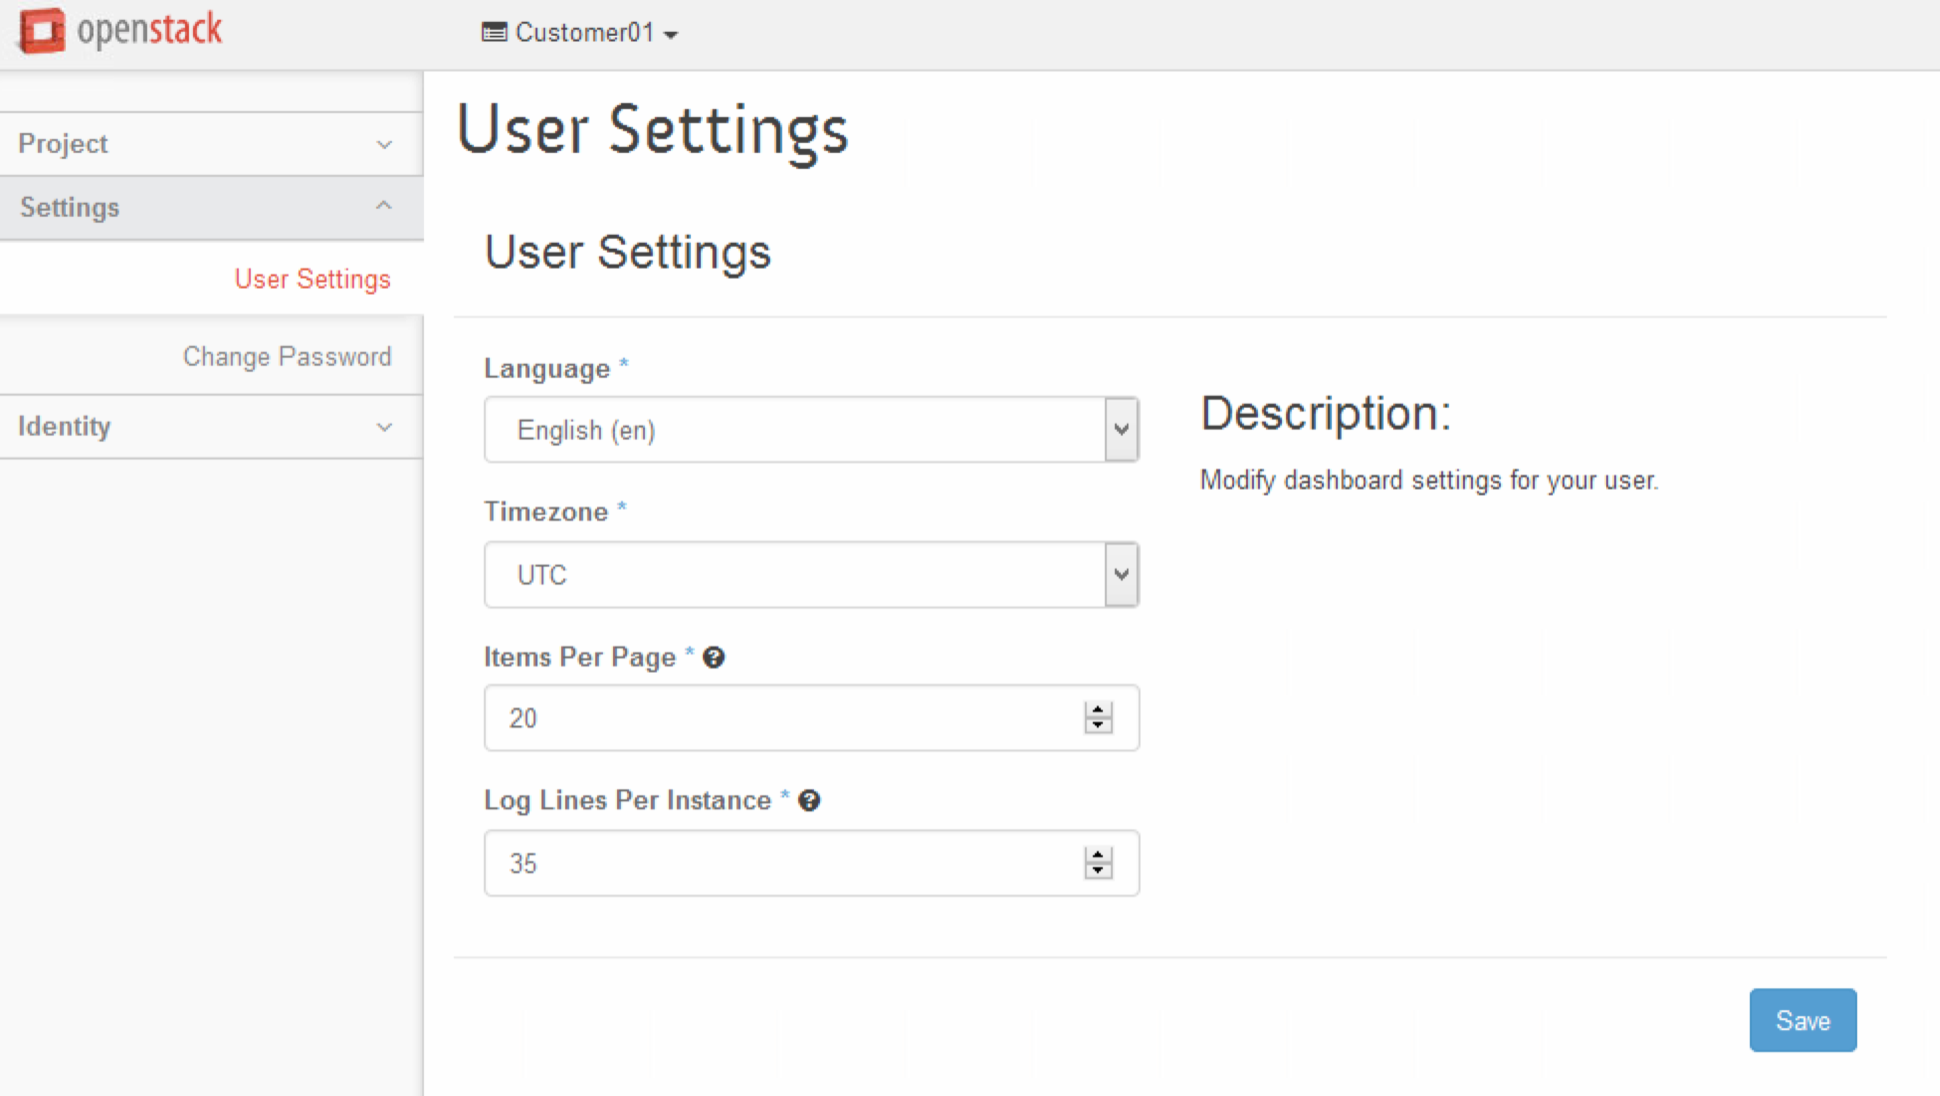
- Change user settings by clicking the the user name to the right in the top bar

- There are not that many settings you can change but at least:
- Language
- Time Zone
- Items Per Page
- Log Lines Per Instance
- Password is possible to change via the left sidebar
This conduct this blog post about Projects and Users in the Nutanix OpenStack solution.
When done reading this blog post, please proceed to part three Nutanix OpenStack Part III – Network Management and part four Nutanix OpenStack Part IV – Image management in the blog series.