This could be the easiest application migration you have ever completed
Nutanix released Acropolis Operating System (AOS) version 5.5 a few days ago which I blogged about here. One major shift is that Nutanix Self Service Portal (SSP) has been moved from Prism Element, admin interface per Nutanix cluster, to Prism Central (PC), multi cluster management interface.
If you have SSP enabled in a pre 5.5 AOS Nutanix cluster you’ll need to migrate the SSP construct including all objects to PC. Migrations can be frustrating in terms of planning and execution but this migration is dead simple.
There is one requirement before you can start the Nutanix cluster upgrade to 5.5, if you have SSP enabled, and that is you need to have a Prism Central (PC) version 5.5 deployed and PC deployment will not be included in this blog post.
The blog post is divided into the following sections:
Configure PC Authentication
After PC deployment you need to configure the authentication by using the following steps. This can be skipped if you already had a PC deployed and just performed a PC upgrade to version 5.5.
- Log in to PC and configure Authentication, in my case it will be an Microsoft Active Directory configuration

- Click “New Directory”

- Provide the directory information needed and pay attention to the fact that you now need a service account to set this up. This is a new requirement in AOS 5.5

- Verify all looks good and close the Authentication configuration in PC.

Migration
This section will cover the steps required to register PE to PC, upgrade to AOS 5.5 and migrate your pre AOS 5.5 SSP to version 5.5.
- Register your pre 5.5 (in my case 5.1.3) Nutanix cluster to PC 5.5

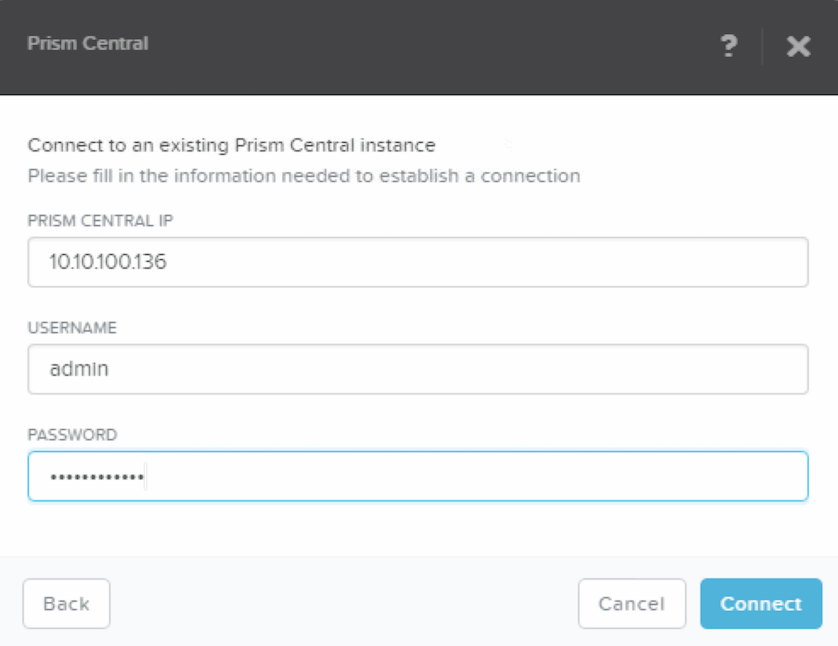
- Click Connect to an existing Prism Central

- Provide the PC registration info needed

- Upgrade the Nutanix Cluster to 5.5 – No image provided but just use the One-Click upgrade functionality. When done continue your steps in PC
- Start the Self-Service Admin management

- Provide the AD auth credentials. I used the same as for the overall PC Authentication.

- Add SSP admins


- Now to the good stuff. Select Migrate SSP

- Since I only got one Nutanix Cluster connected to the PC there is one the NPX5 Nutanix cluster available. Click Migrate

- Wait until the progress bar has completed.

Verification
Now time to verify the VMs, Projects, Roles and Users
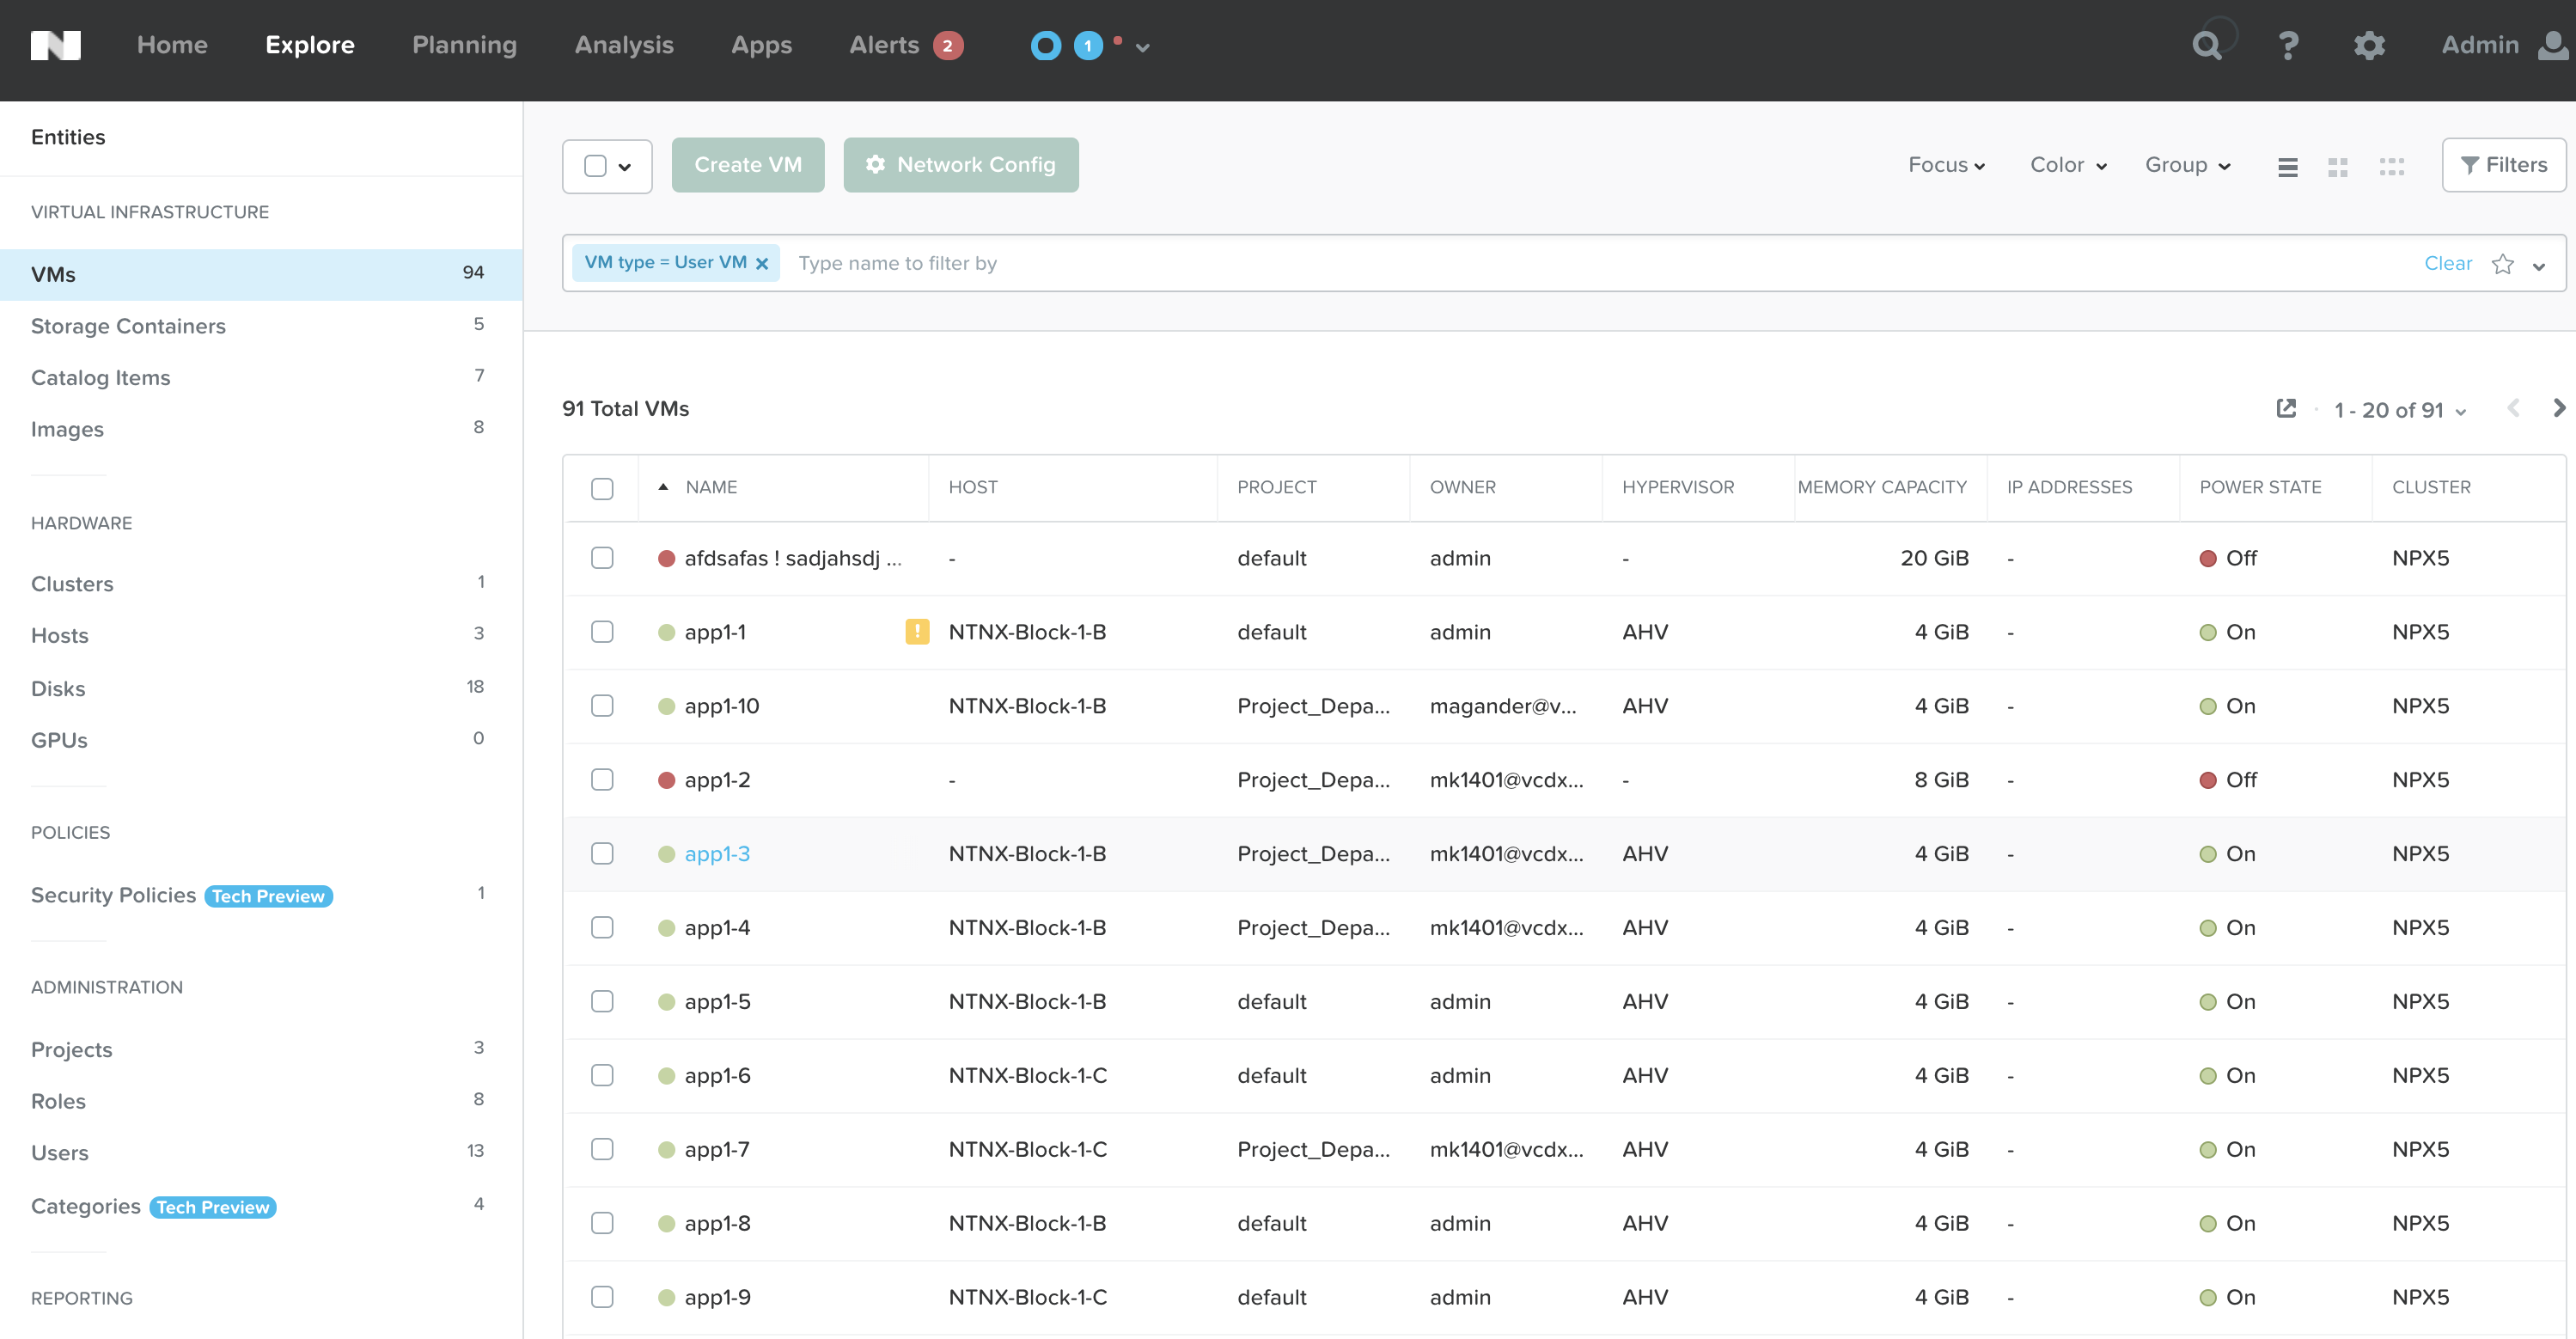
- Log in as an SSP admin and go to Explore and:
- Select VMs. You’ll see all VMs, their corresponding Projects and Owner to mention the most important thing for SSP:

- Click Projects to verify your Projects are there

- Click one project and select users to verify all users still got their permissions

- Click Update Project and scroll down to the Collaboration Section. This is a new SSP 5.5 feature which will allow every user in a Project to see all VMs in the Project. Previous version only allowed me to view my own VMs.

- Click Roles to verify all Roles available

- Verify the Self-Service Admin role works and provides you with access to SSP related objects only. In the previous steps I used the PC admin user which is a member of the Super Admin group

- Log in to PC with a user added to the Self-Service Admin group. In my case I’ll use magander@vcdx56.local (Friendly Name Magnus Andersson)

- Select VMs. You’ll see all VMs, their corresponding Projects and Owner to mention the most important thing for SSP:
- Log in to SSP with a Project member

- Verify the logged in user can see his/her VMs

- After enable “Allow collaboration” as an SSP admin and after a refresh you’ll see the other (in this case 4 VMs) Project VMs show up
